Therefore, if you install Windows 10 in your computer, and If you would like to enter BOIS menu in Windows 10 Lenovo IdeaPad because of some reasons, how to do that? Hey you are so lucky to read this article here. In this article, we are going to talk about how to enter the BIOS menu on a Windows 10 Lenovo IdeaPad.

What is the Time to Enter Lenovo Windows 10 BIOS Setting?
In the absence of such a message, the right moment generally is when manufacturer logos are displayed, prior to the booting of the operating system Windows 10. And the easiest way to not miss the time when you can enter the BIOS, is to press the right key even before you power on the Lenovo computer and hold it until the BIOS comes up. If that doesn’t work, you’re not pressing the right key or something is broken.
Which Button is the Right Key to Enter Lenovo Windows 10 BIOS?
As you can see, different PC motherboard uses different keys to enter BIOS. So if you don't tell them, it will take time for you on it. Common keys to enter BIOS are F1, F2, F10, Delete or ESC button. What's more, a key like F10 may actually launch something else, like the boot menu. So it depends.
How to Enter BIOS Menu in Windows 10 Lenovo IdeaPad?
Situation 1: When you can open Lenovo normally
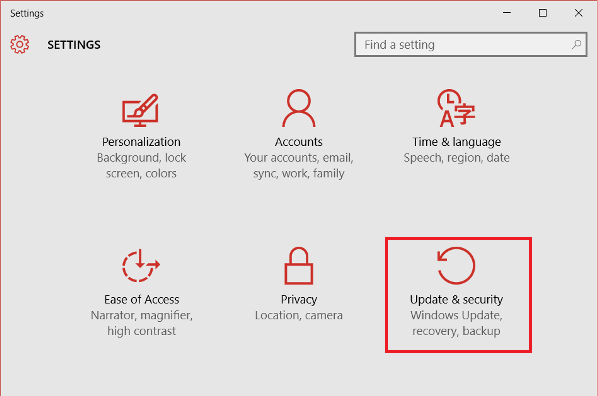
Step 1: Click on the Start menu and select Settings.
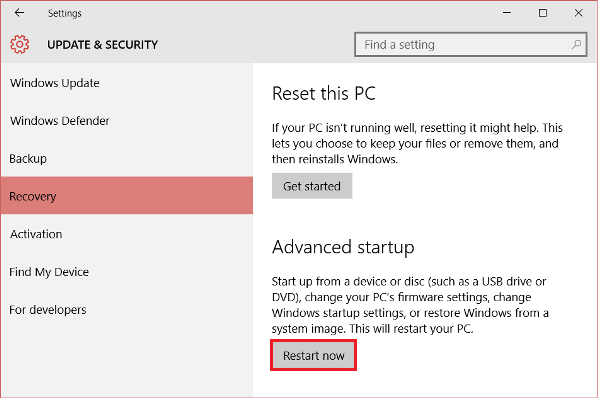
Step 2: Click "Update & Security" and then choose "Recovery" button.

Step 3: Scroll to the bottom and click on Advanced Startup -> Restart Now.

Step 4: Click on Troubleshoot and choose Advanced options.
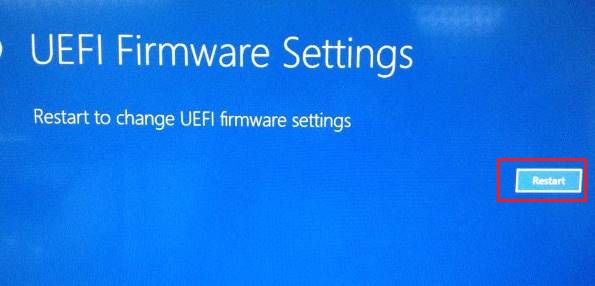
Step 5: Click on UEFI Firmware Settings and then click on Restart.

Situation 2: When you can't open Lenovo normally
Step 1: Press and hold the Power Button for few seconds to turn off your system completely.
Step 2: Power on your system. Press Enter button immediately as Lenovo or Thinkpad/Thinkcentre logo appears.
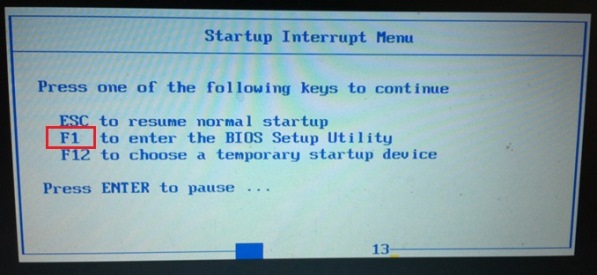
Step 3: Press F1 to enter into BIOS Setup.
